
In this post, one of our lead trainers and a digital transformation extraordinaire, Jesse Sutherland, is jazzed to highlight his best Gmail tips and tricks.
We know change can be hard, certainly when it comes to your webmail, where you spend a good amount of your day. Today’s post is intended to make your Gmail experience much more enjoyable. Here are five tips to organize your inbox:
- Benefits of the new Gmail interface
- Choose the inbox type that best suits how you work
- Live the Label Life
- How to find archived messages in your inbox
- Inbox hygiene - 3 pointers for keeping your inbox clean
1. Benefits of the New Gmail Interface
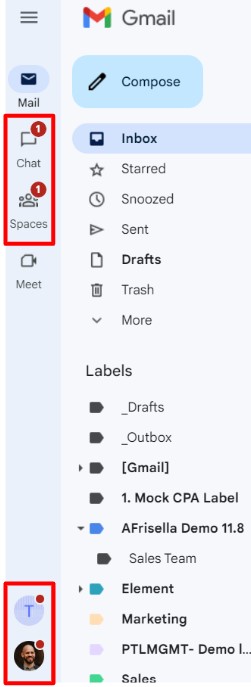
Out with the old and in with the new isn’t always a good thing, but in this case, it happens to be a great thing! The new, overhauled Gmail interface takes into account what users have been asking for and greatly reduces that cluttered feeling. They do this by offering sleek and user-friendly adjustments, including a much cleaner arrangement of the integrated applications.
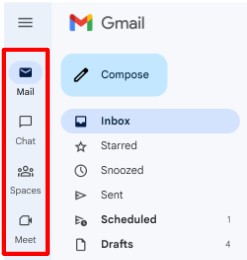
When it comes to monitoring all of your chats and spaces, you’ll never have to worry about missing those important messages. The notification system has been redesigned, so it is directly in your line of sight, far less crowded, and more obvious when alerting you of new messages in chat or spaces.
2. Choose the Inbox type that best suits you
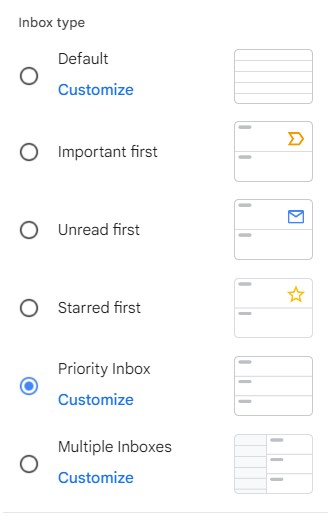
In the wonderful world of Google Workspace, the core applications inherently provide flexibility when it comes to establishing your preferred workflows. Simply put, by design, there are multiple ways to accomplish the same task built into the products. Particularly with Gmail and your inbox, they had given you six different inbox types to choose from, which can be overwhelming when first getting started. This is when doing a little bit of testing can make all the difference. What better than for me to tell you about a few of my favorites to save you time!
Default inbox, tried and true, simplest in its form, this layout will present all of your messages in chronological order, plain and simple.
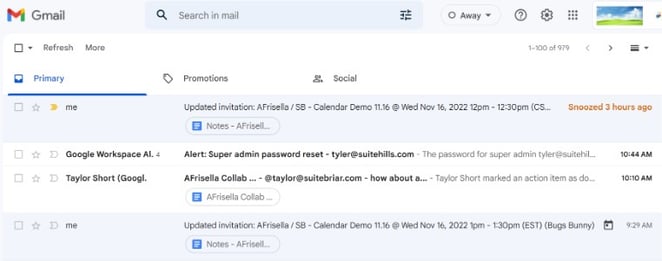
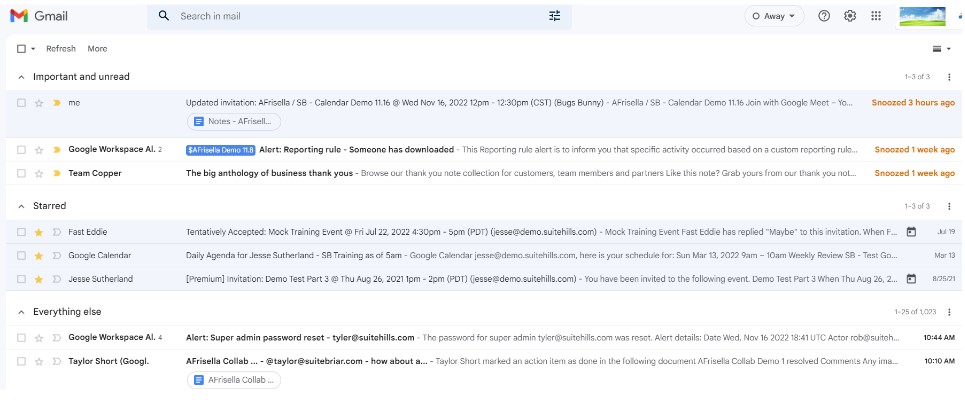
Priority inbox is ideal for quickly separating your messages into things that need to be actioned on quickly (important section), longer-term follow-up items (starred section), and then all the rest (everything else).
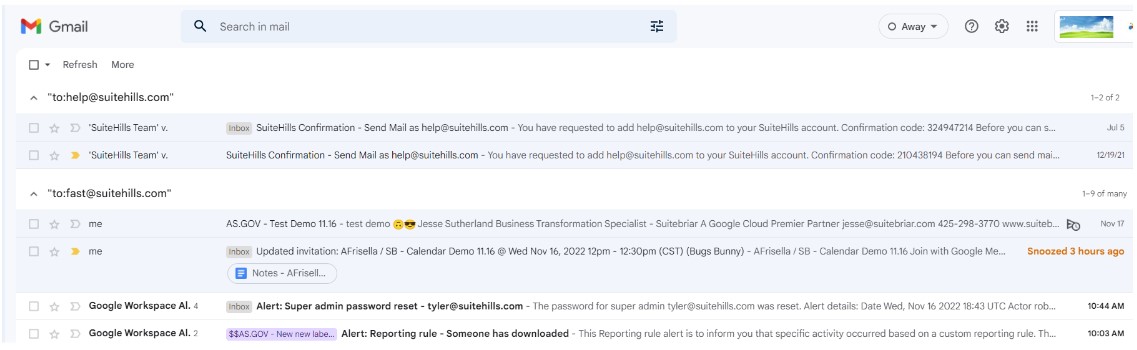
Finally, for all the power users out there, multiple inboxes. This takes time to set up, allowing for the most curated experience when it comes to Gmail inboxes allowing you to specify up to 5 different sections. When it comes to what you want these sections to be, you have lots of freedom ranging from displaying messages from groups you are a member of, mail from specific users, and much more.
To access the different inbox types first click on the settings menu by clicking on the gear icon in the top right corner of your Gmail homepage. Then scroll down to the inbox type section and fire away.
3. Living that #Label life
For many users that are exposed to labels for the first time, there is more than meets the eye with labels that they might not realize. Gmails labels often get mistaken for being just a folder by a different name, which is inaccurate and truly selling them short. Can labels be used like you would a traditional folder, dragging and dropping messages over a label to file them away to be organized? Absolutely.

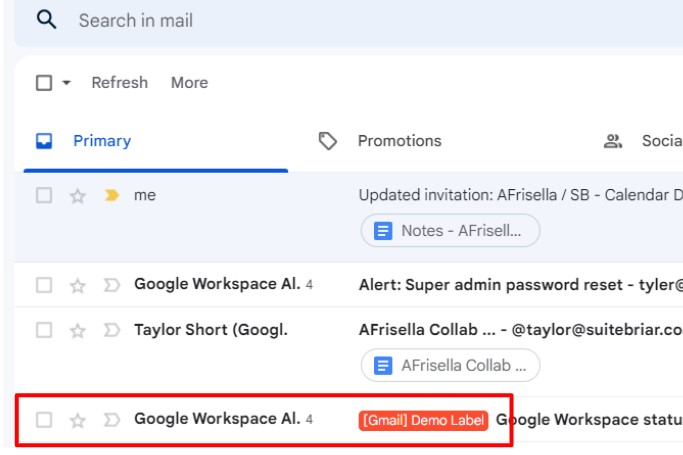
However, they also can do much more, in a similar vein to how you would use a post-it, dragging and dropping labels onto any messages creating a masterfully managed inbox.
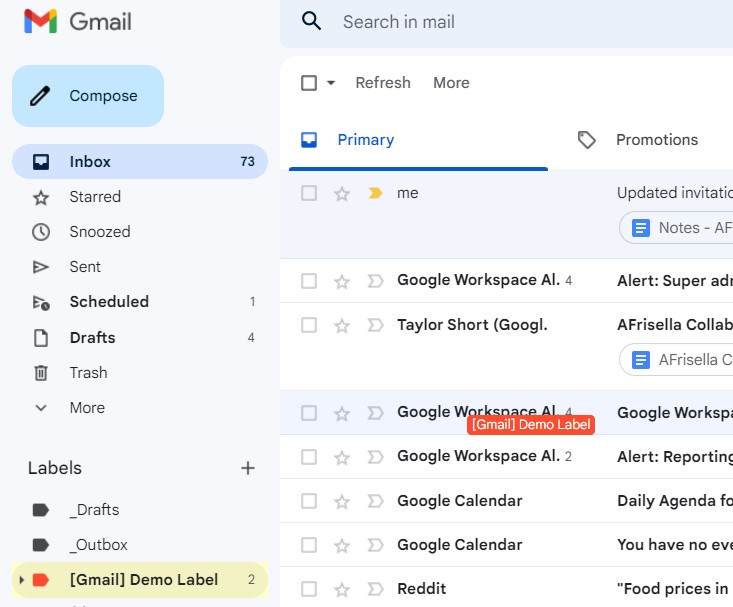
After dropping the post-it on top of the message, it will then be visible on the message while it is sitting in your inbox.
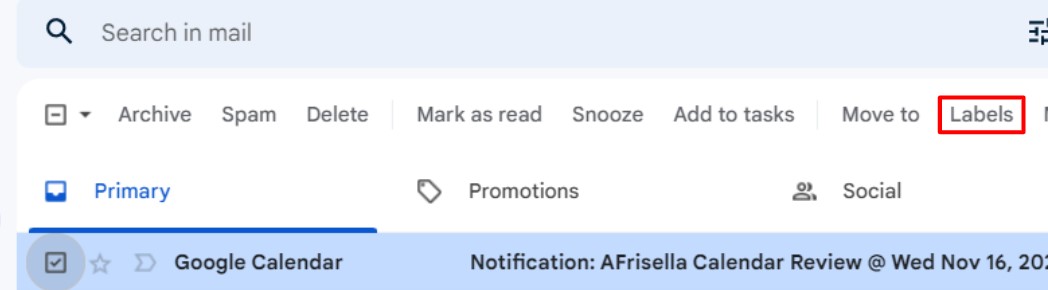
In addition to the drag-and-drop functionality of labels, for those that prefer using buttons, they can utilize the action button to apply a label to a message. By either selecting the checkbox next to the message in question to make the action buttons appear and then clicking on Labels to select the label you want to apply.

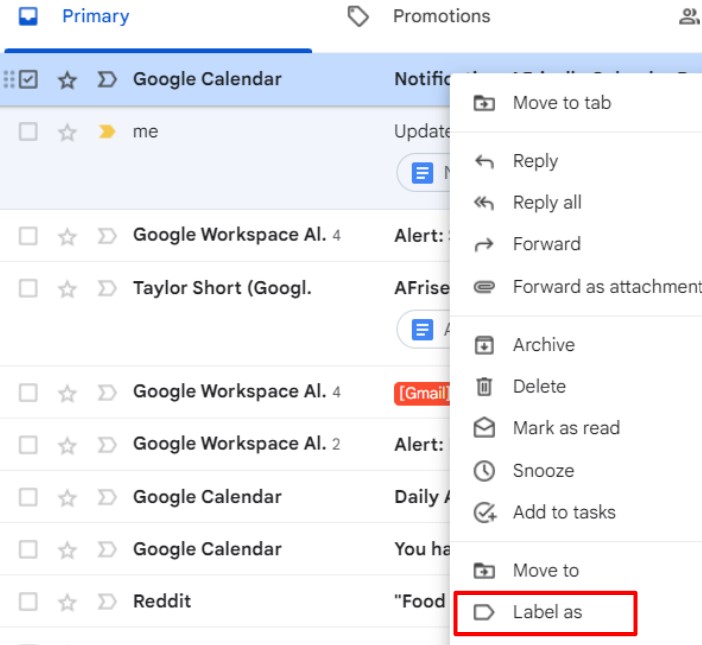
Alternatively right click directly over the message you want to apply a label to and select the ‘Labels as’ button.
4. How to find archived messages in your inbox
By far, one of the most popular questions we get is, what is the best way to search for messages that you have opted to archive? The two simplest answers to this question are as follows. First, you can manually make your way to the All Mail label by first clicking on the More option located directly below your inbox. That will then reveal All Mail click on it.
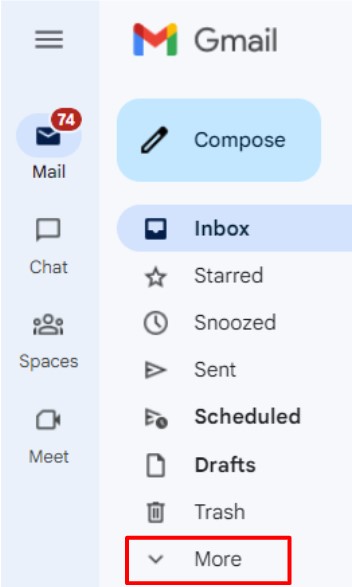
That click will then reveal the All Mail option; click on it.
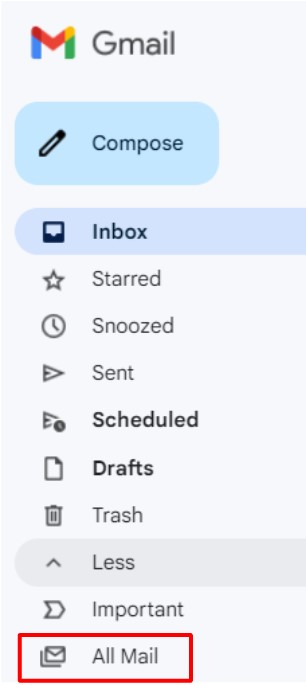
You will now be viewing all of the messages stored in your archive. Anytime you use the archive button, it sends the message here. From here, any search criteria you put in the search bar located in the upper center portion of the screen will look solely through your All Mail archived messages.

The second option to find these long-forgotten messages you’ve saved for another day is, from the get-go direct your attention to your search bar, again located in the upper center portion of your Gmail display. Now before you begin typing anything, first click on the Show search options button located at the end of the search bar text box.

Then make sure the very last field at the bottom of the Search field is set to All Mail. This will guarantee that the search tool sifts through your All Mail label. Enter all of the appropriate details in their respective fields, then hit the search button.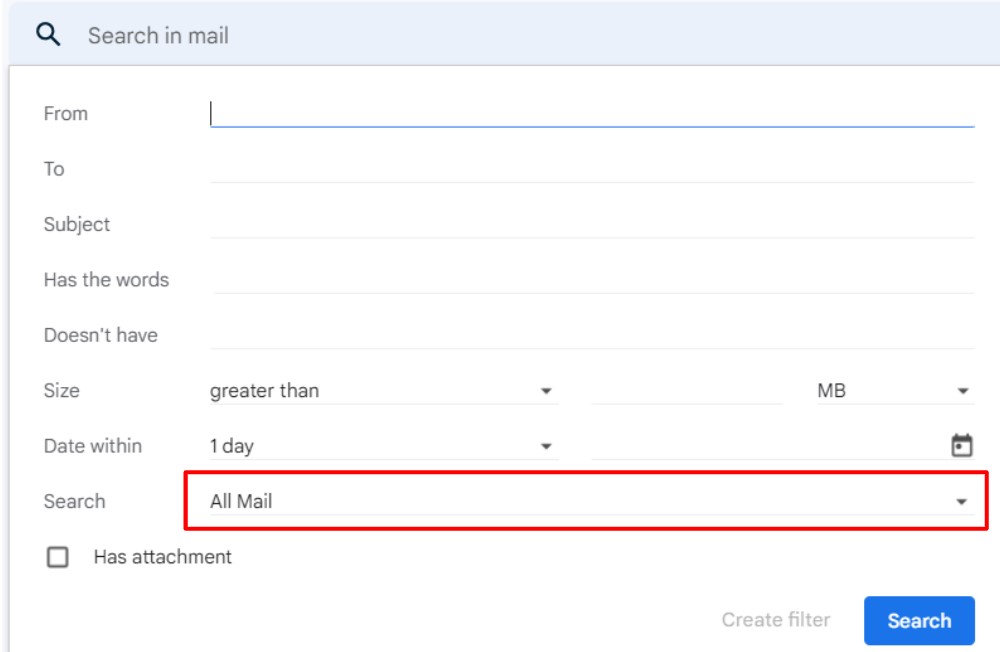
5. How to block emails on Gmail
In this day and age, where our inboxes are constantly flooded with messages we most definitely did not ask for, here are my three-pointers to prevent that from happening.
Block by "Contacts Name"
Firstly, if you are receiving messages from someone that you do not want to hear another peep from, do the following:
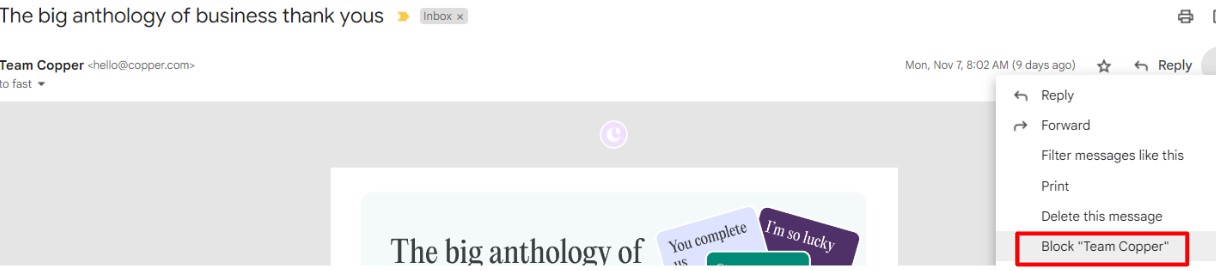
- Open the message
- In the top right corner of the message, click on the three vertical dots.

- Select Block “Contacts Name”. From now on, their messages will bypass your inbox and be sent directly to your spam folder.
Use the Unsubscribe Button
Advanced unwanted mail maneuver #2 is to avoid those pesky mass mailing lists that are finding their way to your inbox. While in your Gmail account, first open the mass message in question, then next to the sender’s name, select the unsubscribe button.

Note: If this option is not presenting itself, simply follow the steps laid out above to never hear from them again.
Use the Report Spam Button
Last but not least, in the trifecta of keeping your inbox untouched from unwanted mail is the almighty report spam button. Gmail inherently does a very thorough job of weeding out nefarious emails, but every once in a while, they can get lucky. If you suspect a message of this nature has found its way into our inbox and avoided detection take the following steps. Once you locate the message in your inbox, click on the checkbox located directly to the left of it.
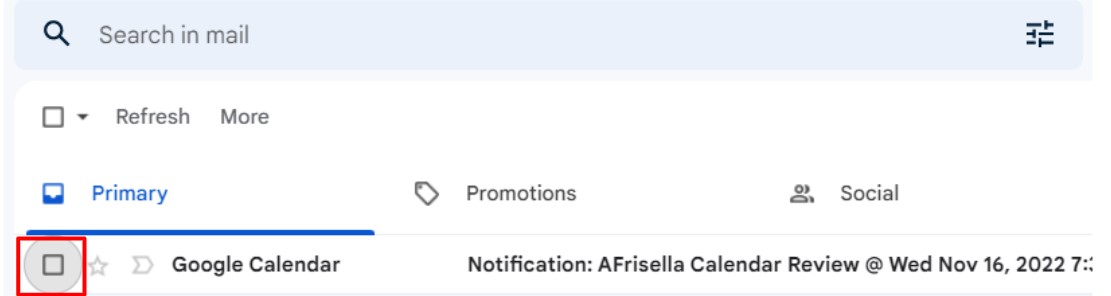
This click will then reveal the action buttons located directly beneath the search bar at the top of the screen. Next, select the second button over the Spam button.
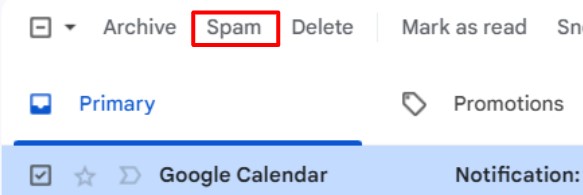
By taking these steps, you will be notified in the bottom left corner of the screen that the message has been tagged as spam.

Additionally, Google will also take a copy of the message for themselves to put under further scrutiny and analysis to protect you and other users in the future.
We hope you found these best Gmail tips and tricks helpful. Of course, there are more than 5 tips to organize your inbox. Contact our team if you want to learn more, and don't forget to subscribe to our blog to get our latest posts emailed directly to your inbox. See step three in this post to learn how to create a label for those messages. ;)

.png?width=150&height=150&name=Inc.%205000%20Annual%20List%20of%20Fastest%20Growing%20Companies%20(2).png)
.png)