
Welcome back for the latest installment in our tips and tricks series by our in-house specialist, Jesse Sutherland. For this month’s entry, we will be shifting our focus to the wonderful world of Google Sheets and, in particular, the use of Google Sheet templates.
For our first-time template users, there is a tremendous benefit to be had both from eliminating redundant sheet creation and, most importantly, all the sweet time you will be saving. Templates allow you to have a base to work from with all the formatting and structure in place, removing the doldrums that are creating the same sheet repeatedly for frequent use.
Below we are going to walk you through creating your very own templates unique to your use case as well as highlighting the template gallery, which is jam-packed with pre-existing templates that Google has so graciously curated.
How to make your very own Google Sheets template
- Once on your computer, open up the sheet you want to turn into a template, whether it’s bread spanking new or you already have something queued up.
- Get the spreadsheet finalized to your liking to the point you are ready to save it as a template.
- Finally, name the spreadsheet appropriately and put “Template” somewhere in the name.
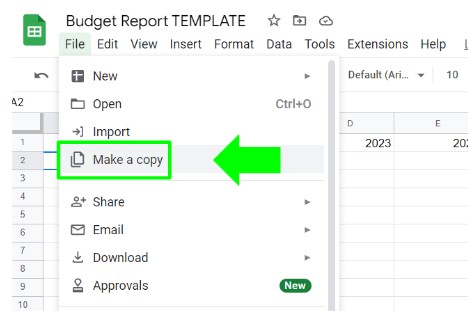
Congratulations, you have created your very own Google Sheets template! From here, you have a few options; you can either keep this template personal to you any time you want to use it, open it up and then make a copy to work from. When using the make a copy feature, be sure to include some unique identifiers in the title to make it stand out, such as the project name or client name associated with it.
If you want to share your template prowess with colleagues and let them reap the benefits of your spreadsheet mastery, your other option is to submit it to the Template Gallery for all to use. Follow the steps below.
How to submit a template to the Google Sheets Template Gallery
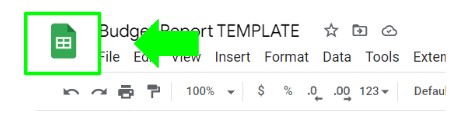
- Navigate to the Google Sheets homepage; you can do this by clicking on the Sheets logo when working out of the template.
- Click on the Template Gallery link in the top right corner of the screen.

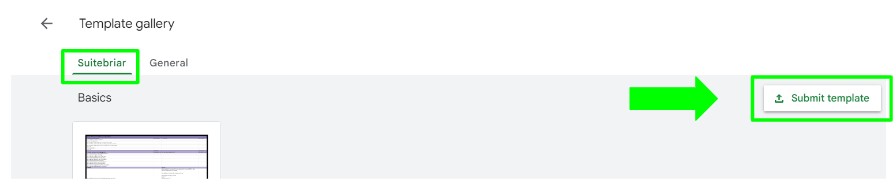
- Lastly, select 'Submit template', choose your recently created masterpiece, and let the sharing begin. Important Note: You need to be sure to have your company name tab selected and not General in order to be able to submit a custom template.
How to access existing Google Sheets templates
As mentioned previously, in addition to sharing your own custom templates, you also have access to a deep catalog of premade template options included and available for immediate use. Take these steps to explore all of the template options.
- Travel to the sheets homepage by either clicking on the sheets logo when working out of a sheet explained above or going to the Google Sheets homepage. Select Template Gallery.
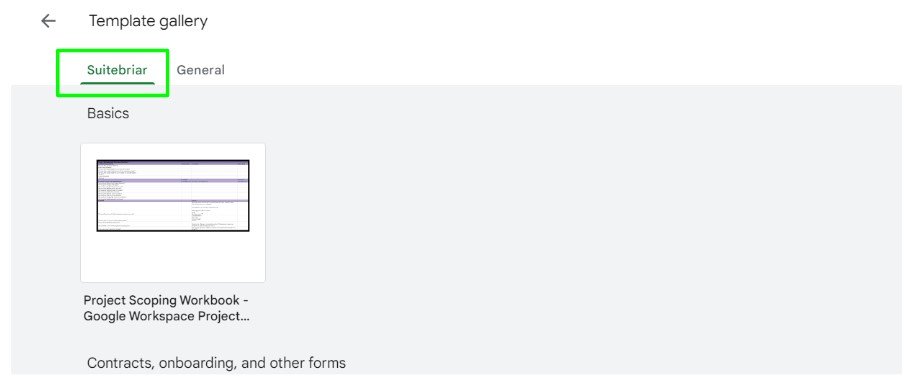
- Underneath the Template gallery, you will see two options:
- The first option is the Company Name tab, which is where all of the custom templates created by you or your coworkers reside.
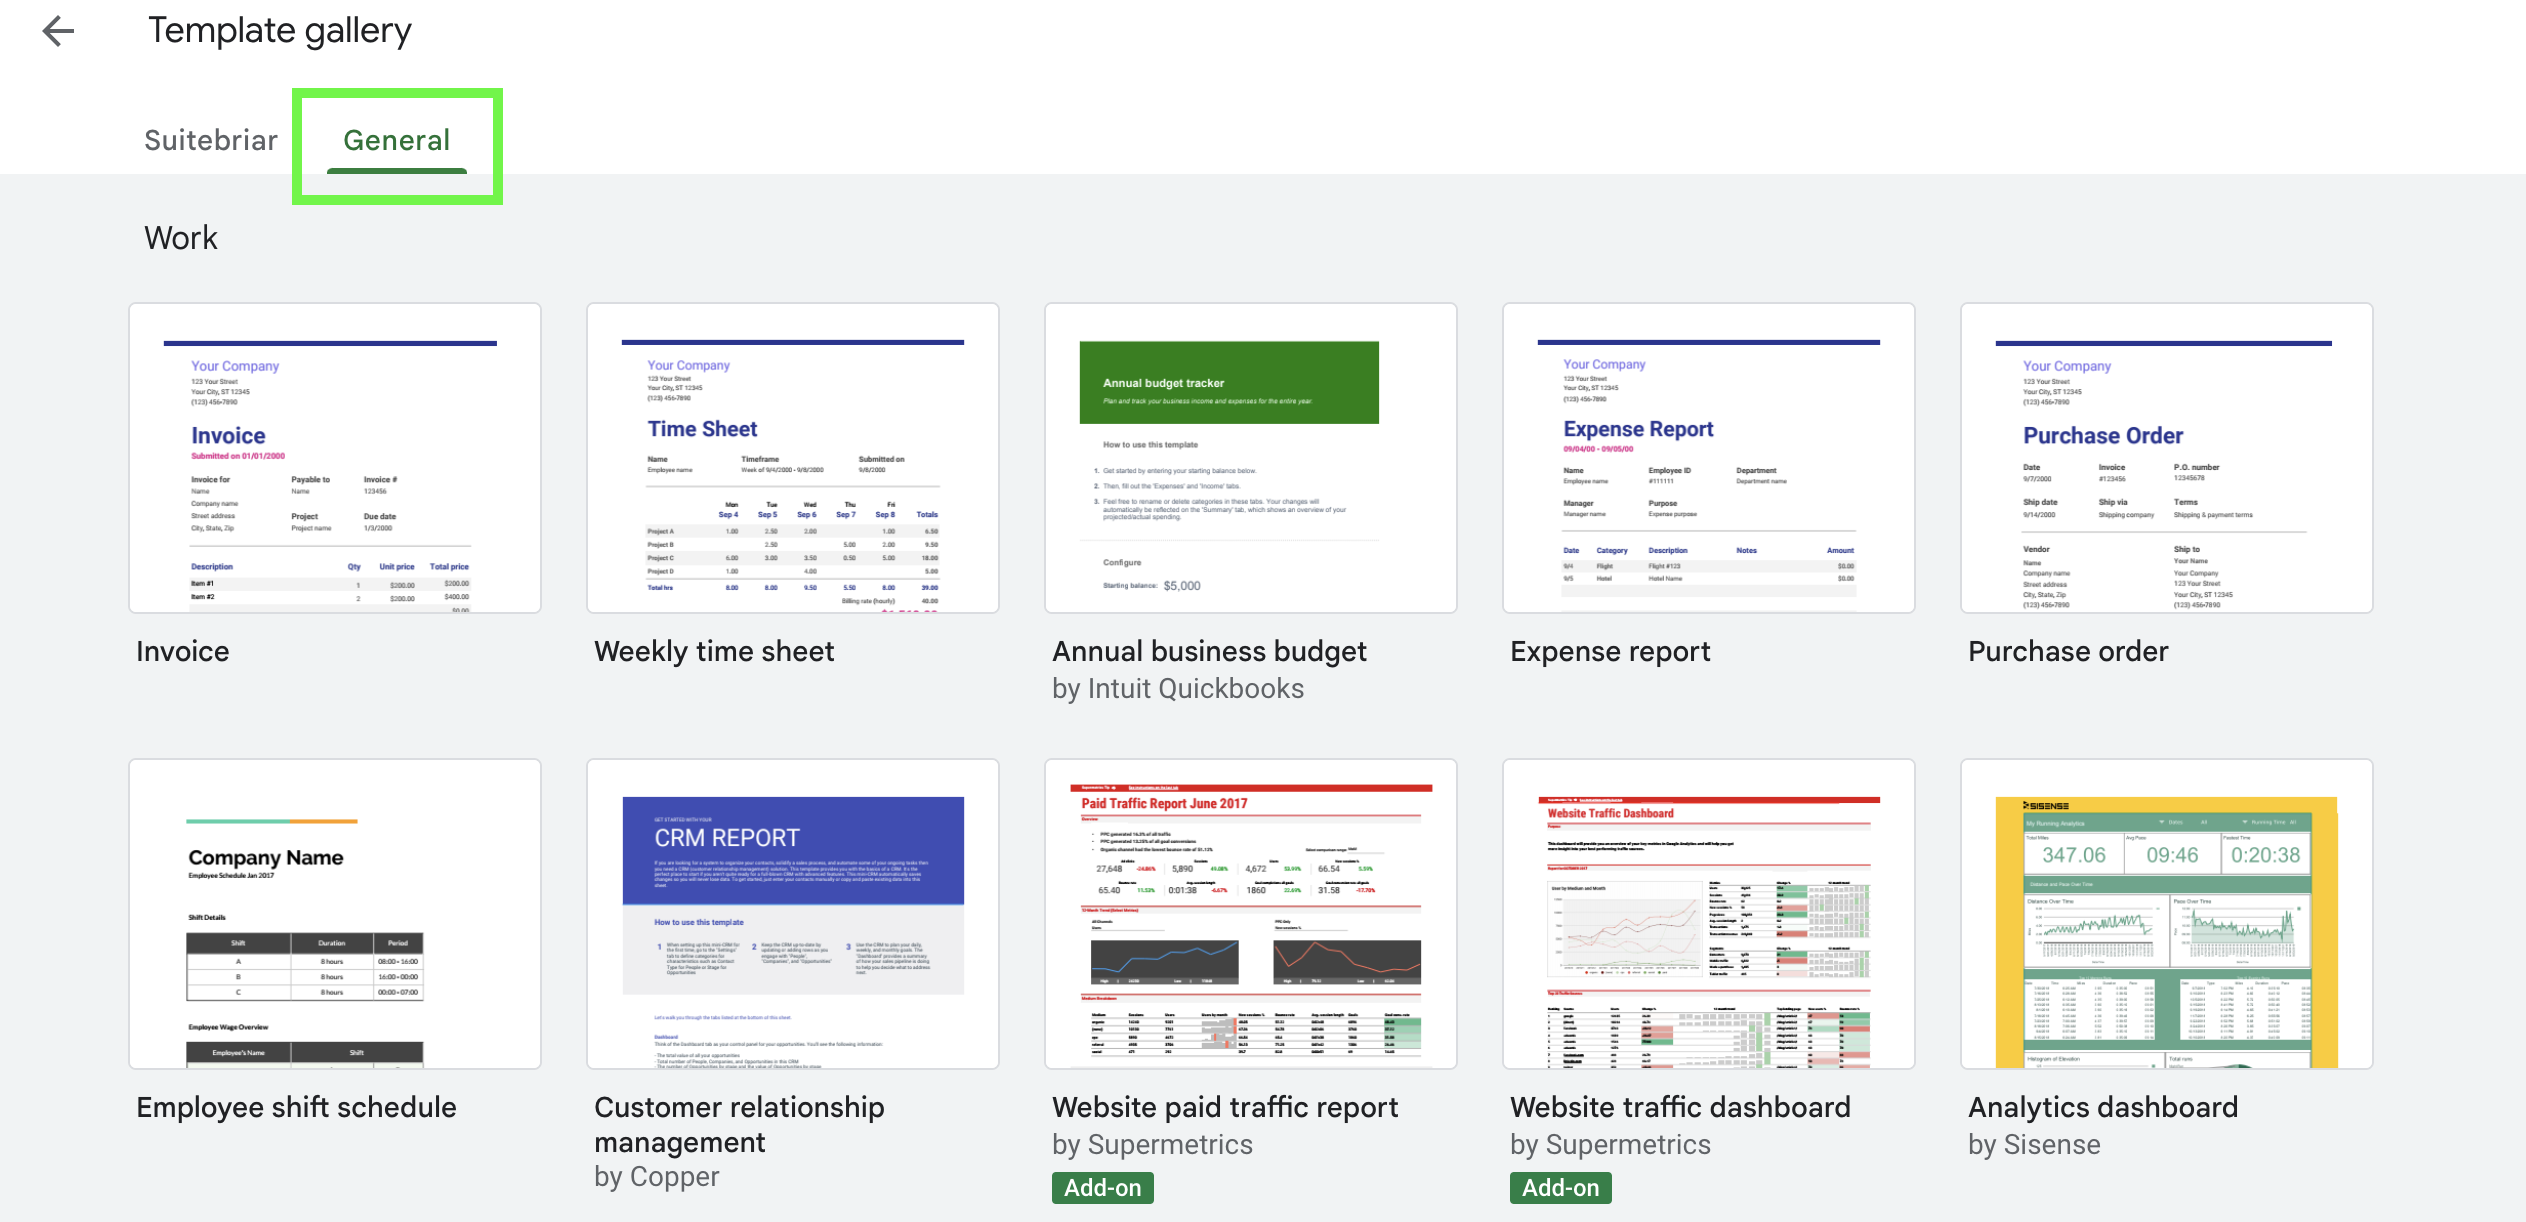
- The second option is the General tab, which is home to all of the prebuilt templates that everyone immediately has access to, which are conveniently grouped together by use. Important note: these general templates are usable on the sheets mobile app, whereas user-generated templates are not.
- The first option is the Company Name tab, which is where all of the custom templates created by you or your coworkers reside.
If you and your team would like more training on how to use Google Sheets templates, contact our team. Don't forget to subscribe to our blog to get our latest posts emailed directly to your inbox. Check out our post the best Gmail tips and tricks to learn how to set up labels for those messages to keep your inbox organized!


.png)